
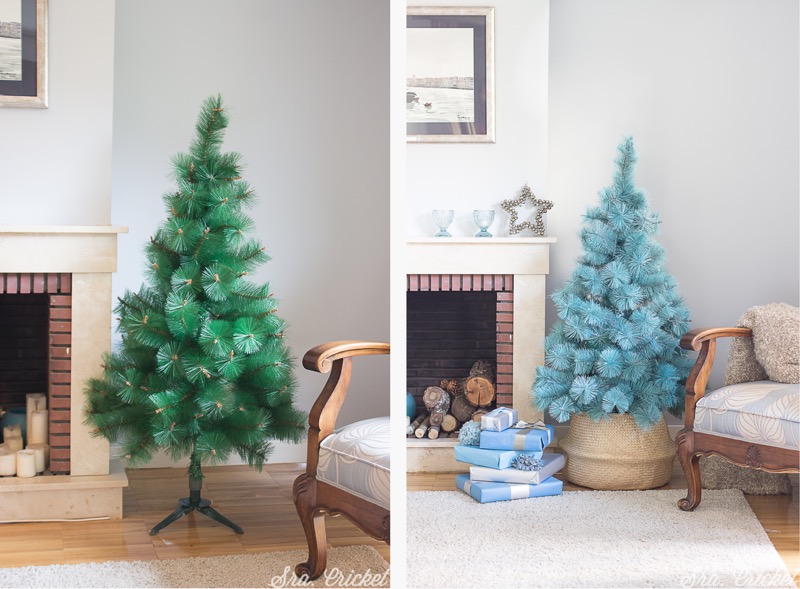
Our friend Ms. Cricket teaches us how to revive the plastic tree you have had in the loft for many years. The before and after photos of the re-styling speak for themselves. A bland plastic tree can become a beautiful new decoration. Here Mrs. Cricket shows you how to do this.
Materials:
- Universal Primer.
- Spray paint Pintyplus Chalk turquoise and off – white.
- Removable Adhesive.
- Waterbased Gloss Varnish.
- Frost powder (silver glitter).
- A plastic Christmas tree.
Step by Step:
Being a plastic tree we used a primer. You simply need a thin layer of this. A primer would not have been necessary if the Pintyplus Basic Evolution paint had been used instead, as these are solvent-based paints that have good adhesion on plastic. However, chalk paint on plastic does not adhere as well on plastic because it is water-based.
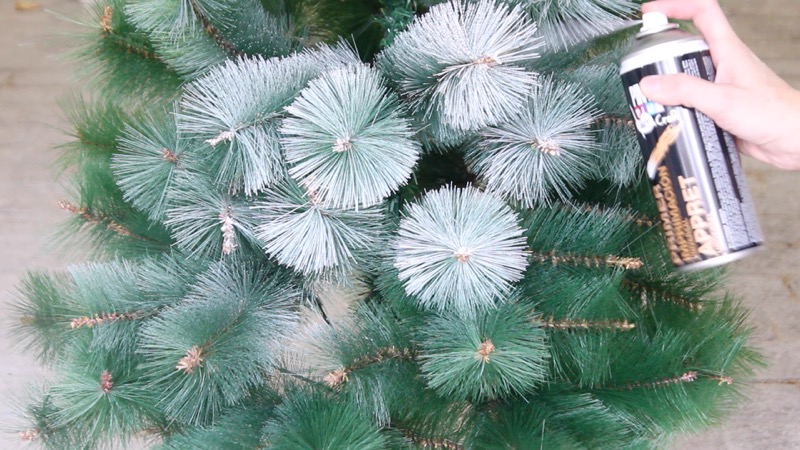
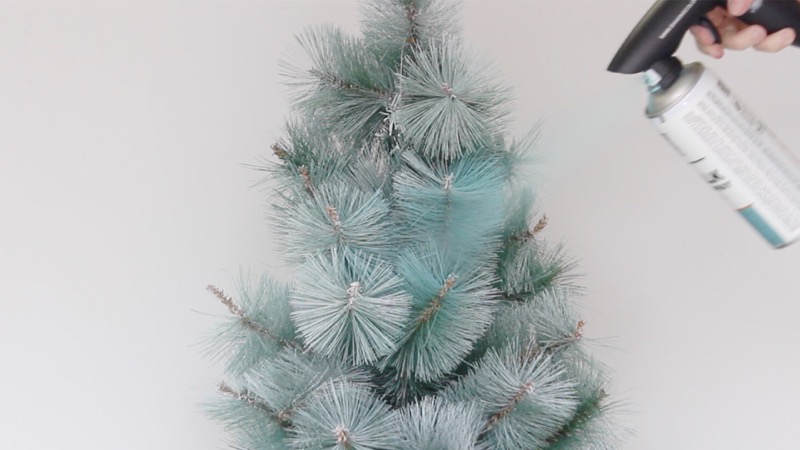
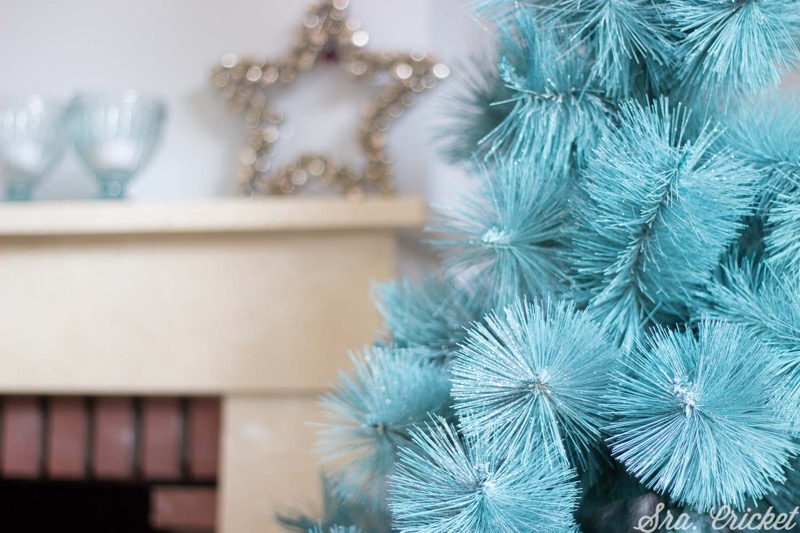
Once dry (totally dry in 1 hour but can paint before), we apply the final layer of Chalk paint. The best technique to use is to apply it like falling rain, very fine so it sits gently on the needles. We gently painted all the individual branches of the tree. For this step Ms. Cricket used the turquoise colour.
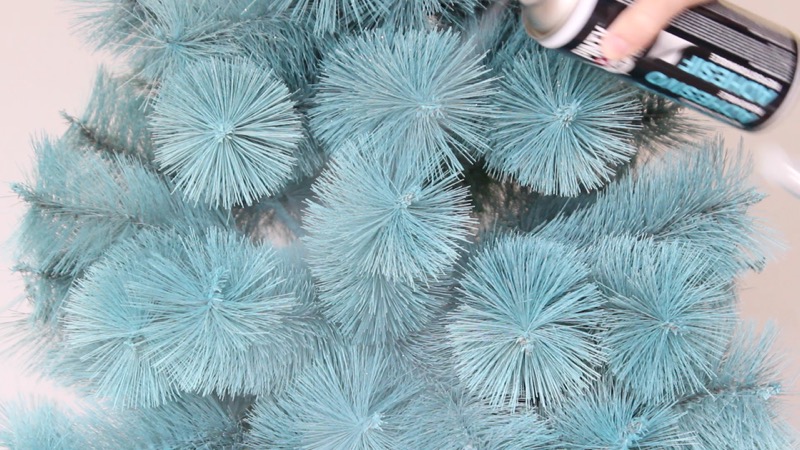
To give a more festive look, she finished the tree with a little Pintyplus Chalk broken white paint in some areas. It gives a very nice frosty feel. Finally adding a touch of silver glitter powder. First she squirted some removable adhesive on the leaves so that the glitter would stick. Then painted with water-based varnish to fix it to the needles.
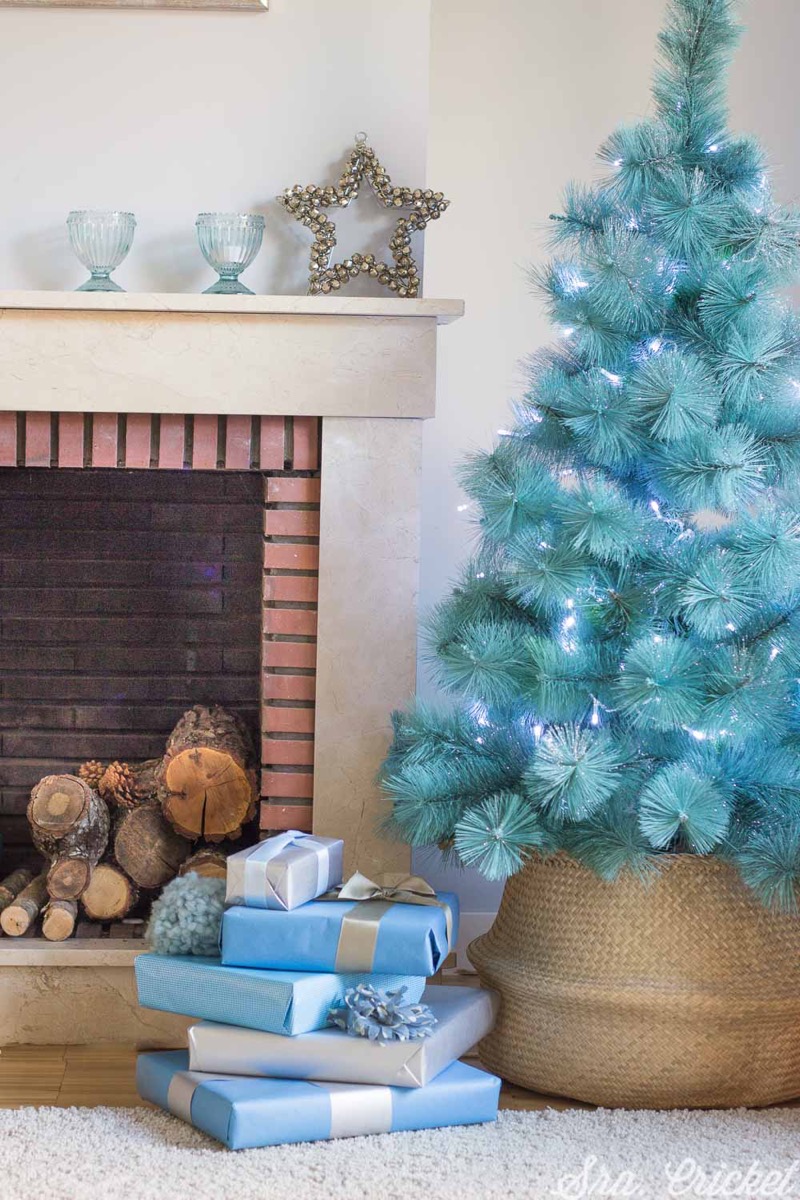
So here is the nice corner where Santa Claus will leave your gifts this Christmas. The basket adds a nice touch to the new style christmas tree.
We love the result, especially the colour and hope you do too.
You have lots of colors to choose from depending on your home decor. If you dare to try, we love you send us images to share them on our Facebook page. Wishing you a happy holiday …
